> ## Documentation Index
> Fetch the complete documentation index at: https://docs.shieldgps.com/llms.txt
> Use this file to discover all available pages before exploring further.
# AT1 Portable GPS Tracker — Setup & Usage Guide
> Set up your AT1 rechargeable portable GPS tracker. Strong magnetic mount, multiple battery modes, and flexible placement — no wiring required.
The AT1 is a rechargeable, portable GPS tracker with a strong built-in magnet that fixes to any metal surface without tools or permanent installation. What sets the AT1 apart is its flexible battery management: choose between standard mode for frequent location updates or power-saving mode to dramatically extend battery life between charges. This makes the AT1 ideal for long-term asset tracking, personal use, or vehicles you can't easily access to recharge regularly.
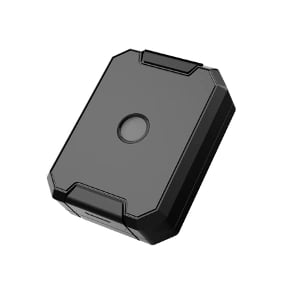 ## What's in the Box
* AT1 tracker unit
* Magnetic charging cable
* Quick-start guide
For the full manufacturer reference, visit the [AT1 User Guide](https://shieldgps.zendesk.com/hc/en-us/articles/10729865950356).
***
## Setup & Placement
Before first use, fully charge your AT1 using the included magnetic charging cable. Attach the magnetic charging connector to the charging port on the device and connect the other end to a USB power source. A full charge typically takes **2–4 hours** depending on the battery level. The LED indicator will change to confirm a full charge.
Visit [shieldgps.co/activate](https://shieldgps.co/activate) and register your AT1 using the 15-digit IMEI number printed on the device and its packaging. An active subscription is required before the AT1 can transmit location data.
Press and hold the power button for **3 seconds** until the LED flashes. The AT1 will begin searching for GPS signal and connecting to the 4G network.
Before placing the device, select the battery mode that suits your use case in the ShieldGPS app:
* **Standard mode** — location updates every 10 seconds; ideal for active vehicle tracking or short-term use where frequent updates are needed.
* **Power-saving mode** — less frequent location updates to significantly extend battery life; best for long-term asset tracking or situations where you won't be able to recharge the device regularly.
You can switch between modes at any time from the device settings in the app.
Use the strong built-in magnet to attach the AT1 to any metal surface. Good hiding spots include the underside of a vehicle chassis, inside a wheel arch, behind a metal interior panel, or underneath metal equipment. Make sure the chosen spot has some exposure to the sky (even through thin metal or plastic) for a reliable GPS signal.
Press the AT1 firmly onto the metal surface. Give it a light tug to confirm the magnet has a solid hold. For rough terrain or high-vibration environments, reinforce the placement with a cable tie or adhesive pad.
Open the ShieldGPS app and verify your AT1 is showing a live location on the map. Check the battery level indicator to monitor charge status at a glance.
***
## Powering On & First Use
Press and hold the power button for 3 seconds to turn the AT1 on. On first use, take the device outside or to an area with a clear view of the sky, and allow up to **2 minutes** for the device to:
1. Acquire a GPS fix
2. Connect to the 4G network
3. Begin transmitting location data to the ShieldGPS platform
To power off the device, press and hold the power button for **5 seconds** until the LED turns off.
***
## Connecting to the App
Install the ShieldGPS app from the [App Store](https://apps.apple.com) or [Google Play](https://play.google.com). You can also manage your device from the web at [shieldgps.co/dashboard](https://shieldgps.co/dashboard).
Open the app and sign in with the credentials you created during activation.
Tap **Add Device** and enter the 15-digit IMEI number from the AT1 unit or its packaging.
In the device settings, select either **Standard** or **Power-Saving** mode to match how you plan to use the tracker (see battery modes below).
Your AT1 will appear on the map. Tap the device icon to see its current location, battery percentage, and movement status.
***
## Battery Modes Explained
Location updates every 10 seconds. Use this mode when active, real-time tracking is your priority — for example, tracking a vehicle in motion or monitoring an asset you expect to move soon.
Less frequent location updates to extend battery life between charges. Use this mode for long-term asset tracking or when you can't easily access the device to recharge it.
***
## LED Indicator Meanings
## What's in the Box
* AT1 tracker unit
* Magnetic charging cable
* Quick-start guide
For the full manufacturer reference, visit the [AT1 User Guide](https://shieldgps.zendesk.com/hc/en-us/articles/10729865950356).
***
## Setup & Placement
Before first use, fully charge your AT1 using the included magnetic charging cable. Attach the magnetic charging connector to the charging port on the device and connect the other end to a USB power source. A full charge typically takes **2–4 hours** depending on the battery level. The LED indicator will change to confirm a full charge.
Visit [shieldgps.co/activate](https://shieldgps.co/activate) and register your AT1 using the 15-digit IMEI number printed on the device and its packaging. An active subscription is required before the AT1 can transmit location data.
Press and hold the power button for **3 seconds** until the LED flashes. The AT1 will begin searching for GPS signal and connecting to the 4G network.
Before placing the device, select the battery mode that suits your use case in the ShieldGPS app:
* **Standard mode** — location updates every 10 seconds; ideal for active vehicle tracking or short-term use where frequent updates are needed.
* **Power-saving mode** — less frequent location updates to significantly extend battery life; best for long-term asset tracking or situations where you won't be able to recharge the device regularly.
You can switch between modes at any time from the device settings in the app.
Use the strong built-in magnet to attach the AT1 to any metal surface. Good hiding spots include the underside of a vehicle chassis, inside a wheel arch, behind a metal interior panel, or underneath metal equipment. Make sure the chosen spot has some exposure to the sky (even through thin metal or plastic) for a reliable GPS signal.
Press the AT1 firmly onto the metal surface. Give it a light tug to confirm the magnet has a solid hold. For rough terrain or high-vibration environments, reinforce the placement with a cable tie or adhesive pad.
Open the ShieldGPS app and verify your AT1 is showing a live location on the map. Check the battery level indicator to monitor charge status at a glance.
***
## Powering On & First Use
Press and hold the power button for 3 seconds to turn the AT1 on. On first use, take the device outside or to an area with a clear view of the sky, and allow up to **2 minutes** for the device to:
1. Acquire a GPS fix
2. Connect to the 4G network
3. Begin transmitting location data to the ShieldGPS platform
To power off the device, press and hold the power button for **5 seconds** until the LED turns off.
***
## Connecting to the App
Install the ShieldGPS app from the [App Store](https://apps.apple.com) or [Google Play](https://play.google.com). You can also manage your device from the web at [shieldgps.co/dashboard](https://shieldgps.co/dashboard).
Open the app and sign in with the credentials you created during activation.
Tap **Add Device** and enter the 15-digit IMEI number from the AT1 unit or its packaging.
In the device settings, select either **Standard** or **Power-Saving** mode to match how you plan to use the tracker (see battery modes below).
Your AT1 will appear on the map. Tap the device icon to see its current location, battery percentage, and movement status.
***
## Battery Modes Explained
Location updates every 10 seconds. Use this mode when active, real-time tracking is your priority — for example, tracking a vehicle in motion or monitoring an asset you expect to move soon.
Less frequent location updates to extend battery life between charges. Use this mode for long-term asset tracking or when you can't easily access the device to recharge it.
***
## LED Indicator Meanings
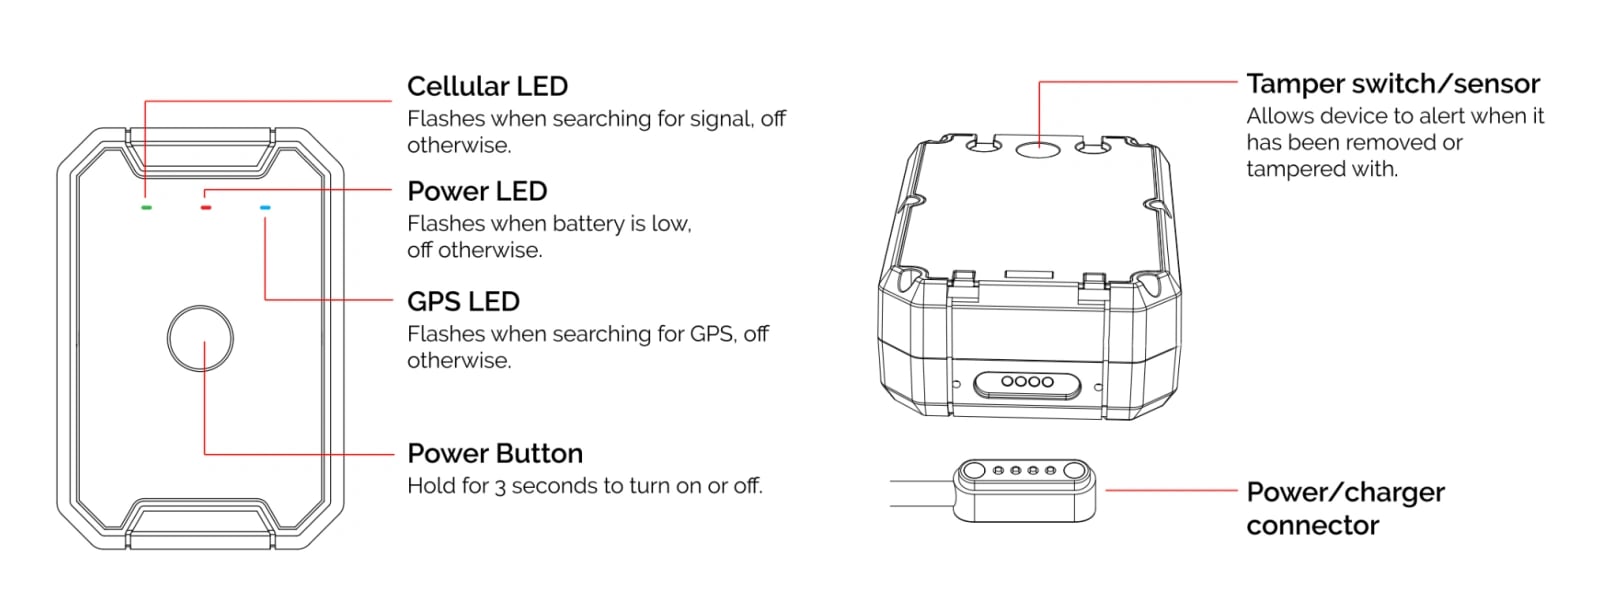 | LED Colour / Pattern | Meaning |
| ------------------------------ | -------------------------------------------------- |
| Solid green | GPS acquired, network connected — normal operation |
| Slow green flash | Searching for GPS signal |
| Slow red flash | No network connection |
| Red (solid, while charging) | Charging in progress |
| Green (solid, while on charge) | Fully charged |
| Fast red flash | Device error — power off and on again |
| Fast orange/amber flash | Low battery — charge soon |
***
A subscription is required for your AT1 to transmit live location data. Without an active plan, the device cannot send updates to the app or dashboard. Visit [Activate Your Tracker](/getting-started/activate-your-tracker) to set up or manage your subscription.
Switch to power-saving mode whenever you don't need real-time updates. This can extend battery life considerably, reducing how often you need to retrieve and recharge the device — particularly useful when the AT1 is hidden in a hard-to-reach location.
Do not use a third-party charging cable with the AT1. The magnetic charging connector is proprietary — using an incompatible cable may damage the charging port or fail to charge the device correctly.
| LED Colour / Pattern | Meaning |
| ------------------------------ | -------------------------------------------------- |
| Solid green | GPS acquired, network connected — normal operation |
| Slow green flash | Searching for GPS signal |
| Slow red flash | No network connection |
| Red (solid, while charging) | Charging in progress |
| Green (solid, while on charge) | Fully charged |
| Fast red flash | Device error — power off and on again |
| Fast orange/amber flash | Low battery — charge soon |
***
A subscription is required for your AT1 to transmit live location data. Without an active plan, the device cannot send updates to the app or dashboard. Visit [Activate Your Tracker](/getting-started/activate-your-tracker) to set up or manage your subscription.
Switch to power-saving mode whenever you don't need real-time updates. This can extend battery life considerably, reducing how often you need to retrieve and recharge the device — particularly useful when the AT1 is hidden in a hard-to-reach location.
Do not use a third-party charging cable with the AT1. The magnetic charging connector is proprietary — using an incompatible cable may damage the charging port or fail to charge the device correctly.